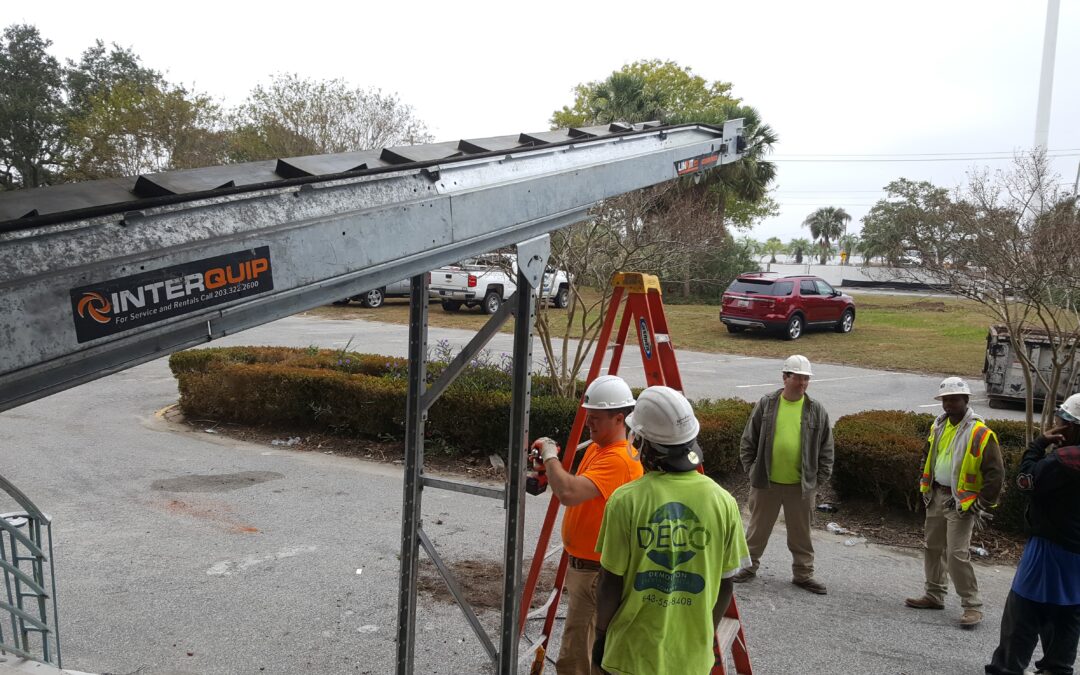
Pictured in this demolition project is the EASIKIT modular conveyor. A team of conveyors was assembled on-site to withdraw material level by level from the building to the beds of dump trucks for removal.

We’re in the business of conveyors, so we know that when you use and maintain our conveyors properly, you’ll maximize their lifespan and assure worksite safety and efficiency. We’ve assembled this general guide for the safe operation, maintenance, and troubleshooting of belt conveyors. For additional guidance, visit the Resources section on our website to download and refer to the model-specific operation & maintenance manuals.

OPERATION

REMEMBER! You are feeding a moving belt, so feed accordingly and the conveyor will work very well. Overload and you will cause jamming breakdowns which in turn will cost time, money and safety! Keep the conveyor clean, particularly under and around the loading section.

  • Start-Up Procedure. Check the discharge area before turning on the conveyor and warn workers in the area. Switch on the electrical supply and press the green start button. Observe the operation and tracking of the belt. If no adjustments are required, commence loading.
  • Loading. Conveyors are only to be loaded at the feed hopper or at designated loading points. Do not begin loading until the conveyor has been started, and then feed evenly and steadily. On steeper inclines, some rollback will occur, so care must be taken to ensure injury cannot be caused tot he operator/loader by large items that could fall off the end of the conveyor.
  • Shut-Down Procedure. Ensure the belt is emptied, press the stop button, then switch off the power at the control isolator switch on the contractor’s power supply. Transformers should be switched off at the end of the working day.
  • Belt. Check belt tension and adjust if necessary. The correct tension is the minimum required to maintain the drive to the belt.

MAINTENANCE

Routine maintenance checks are recommended at regular intervals depending on the frequency of use as well as the type and volume of material handled.

  • Daily Checks. Prior to daily use, a walk-around visual inspection should be performed. Any defects should be reported and corrected prior to use.
  • Weekly Checks. For every 60 hours operated, conveyors should be minimally inspected for material feed points, belts and belt joints, belt scrapers, motor, and electrics.
  • Monthly Checks. For every 250 hours operated, in addition to weekly checks, rollers and bottom covers should also be checked.
  • Quarterly Checks. For every 750 hours operated, in addition to weekly and monthly checks, head and tail, toggles and joints, bearings, top covers, tensioning, hopper side guides and grease units should also be checked.
  • Annual Checks. For every 3000 hours operated, a complete maintenance check should be completed.

TROUBLESHOOTING

Before performing any conveyor inspection or troubleshooting, be sure to isolate and lock-off power supply! If you cannot lock the power supply, unplug the conveyor from the starter or transformer.

  • Belt tracking to one side at the tail section. STOP the conveyor and ISOLATE POWER SUPPLY. Remove the feed boot, release the tension off of the belt and ensure there is no build-up around the tail drum or any stones trapped between the drum and framework, then test to ensure the drum runs freely. Also, carry out a visual check on bearing condition (any play or noise) and if you find there is a problem contact our service department who will arrange for a visit. If no problem is found, tension the belt and connect the
    power and switch on, whilst the belt is running check the tracking and adjust as necessary to centralize the belt on the roller, switch off and refit the feed boot.
  • Belt tracking over at the head section. STOP the conveyor and ISOLATE POWER SUPPLY. Check the head unit for any build-up around the head drum or rollers and clear if found. Loosen the four locating bolts and make the necessary adjustments to centralize the belt, start the conveyor and check the position of the belt and make any final adjustments, retighten the four locating bolts and lock off the adjusting stud.
  • Motor’s on, but belt’s not moving. ISOLATE POWER SUPPLY. Check moving parts are free from obstruction. Tension the belt by adjusting the tension bolts evenly on the tail section. Restore the power and institute the start-up, check belt tracking and adjust as necessary.
  • Motor cuts out. ISOLATE POWER SUPPLY. Check that nothing has jammed any moving parts, particularly behind loading back guard.
  • Starter not working. ISOLATE POWER SUPPLY. Check that the main fuse has not tripped, check the power lead to ensure that no damage has occurred, unplug the lead from the power socket, a competent electrician could check for loose or disconnected wires within the plugs and sockets.
  • Starter clicks, but motor doesn’t work. ISOLATE POWER SUPPLY. Check the plug from starter to motor for any loose wires, check the wire for any damage.
  • Material jammed under the hopper. ISOLATE POWER SUPPLY. If the item cannot be removed easily, contact our service department for assistance.
  • Noise. If the conveyor starts to make any form of noise other than the normal operational noise, STOP AND ISOLATE the conveyor and check for something jamming the conveyor. If you find anything, remove it, if the noise persists, contact our service department for assistance.

And if all else fails, contact the Conveyor Guys at InterQuip to get your equipment back up and running and keep your worksite safe! Call (866) 923-6579, drop an email to [email protected] or fill out the form below.